Grouting is the step that makes or breaks a tiling job. You can lay perfect tiles, but get the grout wrong. Whether it is the wrong type, wrong timing or wrong mix, the whole thing either looks amateur or fails completely.
This guide covers the full process, from selecting your grout to the final seal. Written from a tiler’s perspective, not a DIY blogger’s.
What Is Grout and Why Does It Matter?
The Role of Grout in Tile Installation
Grout fills the joints between tiles. It does three things:
- Locks the tiles together structurally
- Prevents water and debris from getting under the tile surface
- Completes the visual finish of the tiled area
In wet areas like showers and bathrooms, grout also forms part of the waterproofing system under AS 3740 (Australian Standard for waterproofing in wet areas). This is why choosing the right grout type actually matters. It’s not just about picking a colour.
What Happens If You Use the Wrong Grout or Skip Sealing?
- Unsanded grout in wide joints → cracks within months
- Cementitious grout in a shower without sealing → absorbs moisture → stains, mould, premature failure
- Grouting before adhesive has cured → adhesive flexes under the grout → joints crack
These mistakes are almost always avoidable. That’s the whole point of this guide.
Types of Grout — Which One Is Right for Your Project?
Sanded Grout — When and Where to Use It
Use sanded grout for joints 3mm or wider. The sand content gives it structural strength for larger gaps.
Best for:
- Floor tiles
- External paving
- Any joint that’s 3mm or more in width
Unsanded Grout — Best for Joints Under 3mm
Smoother and finer than sanded grout. Designed for tight joints and polished surfaces.
Best for:
- Wall tiles with narrow 2–3mm joints
- Polished marble or glass tiles (sanded grout can scratch the surface)
- Rectified tiles with slim joints
Epoxy Grout — The Best Choice for Wet Areas in Perth
Epoxy grout is the premium option and the one any experienced Perth tiler will recommend for showers. It’s resin-based rather than cementitious, which means:
- Non-porous — no sealing required
- Highly resistant to staining and mould growth
- Ideal for Perth’s bathroom wet areas
It’s harder to work with and costs roughly 3–5x the price of standard grout. In a shower, it’s genuinely worth it.
Which Grout Is Best for Perth Bathrooms?
| Grout Type | Best For | Sealing Required |
| Sanded (cementitious) | Floor tiles, external areas | Yes |
| Unsanded (cementitious) | Wall tiles, narrow joints | Yes |
| Epoxy | Wet areas, showers, splashbacks | No |
Recommended brands available in Australian hardware stores: Sika, Dunlop, Ardex. These all are widely stocked at Bunnings and specialty tile suppliers.
How to Grout Tiles Step by Step
Step 1 — Surface and Tile Preparation Before Grouting
Before you open the grout bag:
- Confirm tile adhesive is fully cured — minimum 24 hours, often 48 hours in wet areas. Check the adhesive manufacturer’s specification.
- Remove all tile spacers
- Clean joints thoroughly — no adhesive blobs, dust, or debris in the gaps
- Tape any movement joints at corners and junctions — these get silicone, not grout
Step 2 — Mixing Grout to the Right Consistency
Mix to a peanut butter consistency. It should be thick enough to hold shape, wet enough to work into joints smoothly.
- Add powder to water (not the other way around) for a consistent mix
- Use a low-speed drill with a mixing paddle
- Let it slake (rest) for 5–10 minutes after mixing, then stir again briefly
- Only mix what you can use within 20–30 minutes
If the mix starts drying out, don’t add water. Discard it and mix fresh — rewetting weakens the joint.
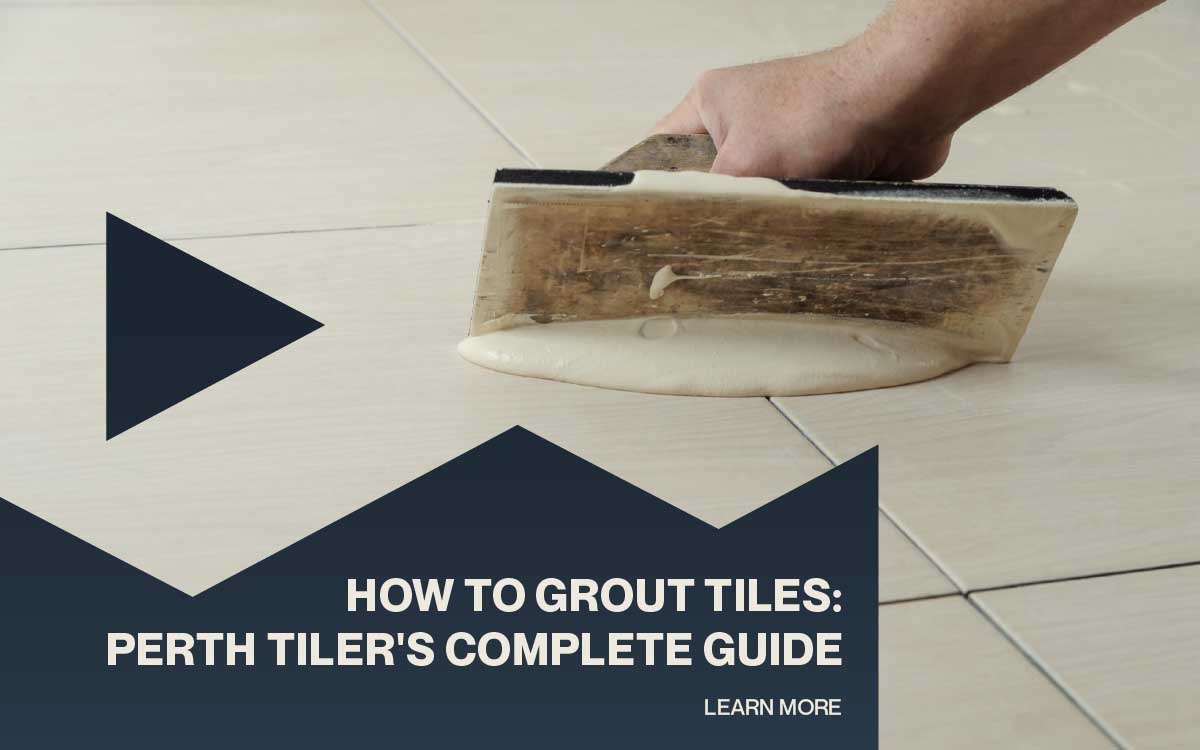
Step 3 — Applying Grout with a Float
- Hold the float at approximately 45 degrees to the tile surface
- Work in diagonal strokes — this forces grout into joints without dragging it back out
- Work in manageable sections (1–2 m² at a time if you’re learning)
- Push firmly — no air pockets, no voids in the joints
Step 4 — Removing Excess Grout Before It Sets
- Wait 15–20 minutes after application (until grout has skinned over but isn’t fully hard)
- First pass: damp sponge, wrung out well, wiping in circular motions
- Rinse sponge regularly in a clean bucket — you’re removing haze, not the joint grout itself
- Second pass: clean, barely-damp sponge to remove the remaining film
- Don’t over-wet the surface — excess water weakens fresh grout joints
Step 5 — Curing Time and Sealing the Grout
Curing times by grout type:
| Grout Type | Walk-On Time | Full Cure | Seal After |
| Cementitious (standard) | 24 hours | 28 days | After full cure |
| Epoxy | 12–24 hours | 7 days | Not requ |
For shower use: don’t run the shower for at least 48–72 hours after grouting, even if the surface feels dry.
Applying grout sealer:
- Apply with a sealer brush to grout lines only
- Wipe off any sealer that contacts the tile face within 5–10 minutes
- Two coats recommended for shower grout
- Reapply every 12–18 months in wet area applications
Common Grouting Mistakes and How Professionals Avoid Them
Grouting Before the Tile Adhesive Has Fully Cured
This is the most common DIY mistake. If the adhesive is still flexing when you grout, that movement transfers to the joints, and they crack. Always wait. Perth’s warmer months speed up adhesive curing, but winter adds more time. When in doubt, wait another day.
Using the Wrong Grout Width for the Tile Size
| Tile Size | Recommended Joint Width |
| Under 300mm | 2–5mm |
| 300–600mm | 3–5mm |
| Over 600mm | 3–8mm |
| Natural stone | 5–10mm (check manufacturer spec) |
Large format tiles need wider joints to accommodate slight variation in tile dimensions and substrate movement.
Skipping the Grout Sealing Step
Unsealed grout in a shower will stain within weeks. It’s also significantly more susceptible to mould growth. Sealing takes about 30 minutes extra on top of the tiling job and meaningfully extends the life of the grout. There is no reason to skip it.
How to Clean Grout After Application
For removing the post-application haze and keeping grout looking fresh long-term, see our full guide on how to clean grout after it sets.
Short version: use a damp microfibre cloth in circular motions once the haze appears. Don’t use acidic cleaners on fresh grout. Wait until full cure before any chemical cleaning.
When to Hire a Professional Tiler to Grout in Perth
DIY grouting is reasonable on:
- Feature walls and splashbacks
- Low-traffic floor areas
- Small decorative tile projects
Get a professional for:
- Any shower, bathroom, or wet area (AS 3740 compliance matters here)
- Large format tiles — more complex joint management and alignment
- Natural stone — requires specific techniques and epoxy grout
- Regrouting over failed existing grout — prep work is everything
Getting grouting wrong in a wet area can cost significantly more to fix than the original job. Tile Solutions WA gets it right the first time. Need professional grouting and tiling Perth? Get a free quote.
Need Professional Grouting in Perth?
Whether it’s a fresh tile installation or regrouting an existing bathroom, Tile Solutions WA does it properly, the first time around.
Call 0450 663 929 or Get a Free Tiling Quote